Video minecraft how to play network. How to play on the local network in Minecraft. How to play on the network in Minecraft. Creating a local network
- Game setup
- Enable multiplayer mode
- How to play on the network in Minecraft. Creating a local network
- Physical local area network
- Logical local network
- Creating a server for Minecraft
- How to play on the network in Minecraft. Connect to your server in Minecraft
How to play on the network in Minecraft?

Minecraft is a kind of virtual sandbox in which you can fight monsters, master crafts and make objects, as well as create your own worlds. The Minecraft gaming community is one of the largest in the world. Many people call this game a real revolution in the indie games industry. The game does not have any official guides, more than earned the respect of fans. In this article we will tell you only about the basic steps that any user in this game will certainly do and how to play Minecraft over the network.
Play in good game over the Internet with real opponents gorgeous. The adrenaline associated with such a game is definitely worth it. If you want to enjoy great multiplayer games, and if you don't want to buy expensive versions of games, you can use hamachi. This connection of two computers is absolutely great and will allow you to play almost any game that is also designed to work on the network. This great game is used by a huge number of people all over the world.
You can also say that not only mikklaft hamachi can offer in such a great shape. Excellent need for speed hamachi, of course, will ensure the highest possible quality and speed of the game. Racing is usually more exciting online than the classic one-computer game in which you only imagined opponents.
Game setup
Novice users should first do the following steps:
- Customize game mode and options. When you first turn on Minecraft, you first need to decide how you want to play: in a single game or on the network. A multiplayer game in which several players play simultaneously on servers, is available only for paid accounts.
- In addition, you will need to set the basic settings, which include among other things, the level of complexity and sound settings.
- The game has four levels of difficulty: survival, creative, adventure, and hardcore. The difficulty level mainly affects whether monsters or mobs can appear at night or out of the ground. In addition, on a difficult level, you will also meet with zombies, which can destroy wooden doors and kill the character.
- In multiplayer mode, you do not need to create your own world. You can join someone else's game. In order to select a multiplayer server, you need to go to the game website, for example, PlanetMinecraft. After you have selected the server on which you are going to start developing the land, you can proceed to the network game settings.
Enable multiplayer mode
In order to start playing Minecraft over the network, you need to do the following:
- Run the game.
- Click the Edit button in the upper right corner.
- Click External.
- Enter the name of the selected server, ip-address and port number.
- Click the Add Server button.
- Sometimes the server fails to start the game the first time. If the game did not load, try again.
Perhaps the most important thing in the game is to survive the first night. The whole game is built on the cyclical nature of the day and night. Your task is to have time to build yourself a refuge before sunset, until monsters appear that are ready to kill the character. Then everyone chooses their own style of play, builds special strategies and determines a plan of action. Someone focuses on the construction and collection of various valuable artifacts, someone prefers to focus on weapons. This game is especially good because it does not have a linear plot and clear rules of the game. Everyone can find in it something for themselves.
It seems that everyone plays on the network, you go to the server, and play yourself. But what to do if in a single especially reluctant to run, and with just anyone - too. That would be with friends, or at least with one. But for this you need to make your server. It is possible and run on LAN, if two or three. In general, there are options. Since the moment the multiplayer function appeared in Minecraft, it was mainly the people that played. This then already began to create full-fledged servers. In addition, not all servers can be accessed if the game is not purchased. Moreover, if you officially have to pay for the client part of the game, then the server room is initially freely available, that is, if the machine pulls, and even better, if there is a separate computer where you can install the server, then you can run a full-fledged "adult" server for free, and without violating any laws. In order to play Minecraft online for free, and without registration, you will have to make your own server. Here are some solutions.
How to play on the network in Minecraft. Creating a local network
The local network will be convenient if we want to play with one or two friends. The more people we are going to let into our games, the farther we go from local network , and the closer we get to the full-fledged server. Local network can be created:
- Physically, having two computers in the same room or building, a network cable between them, Wi-fi or through a router.
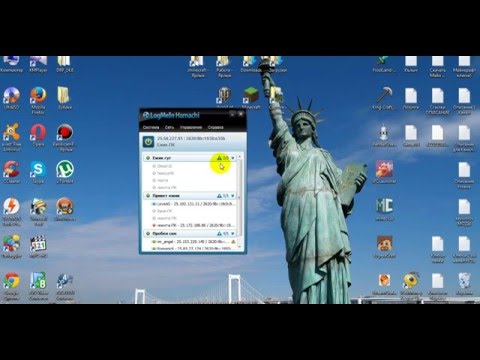
- Software, and computers can then be located in different cities, countries, and so on ... Such a local network is created using VPN, tunneling and other scary things. For our purposes, there is a fairly convenient program - Hamachi, which handles the tunnels on its own. The main thing is that all participants have the same version of hamachi.
Physical local area network
For it you need to connect computers to bypass the Internet. If both of your computers have the same source of Internet access (the same Wi-Fi network, cable connection with one router, etc.), then the probability is high, then physically they are already in the same local area network, or within one "network node". In this case additional setting , most often, it is not needed, the same router is responsible for the distribution of IP addresses. In case two computers are connected directly to each other, you may need to manually configure IP addresses.
After that, you can run Minecraft, create a network game, and start playing. Players will just need to find a server on the local network. The only negative is the high load on the distributing computer or mobile device. Yes, with the appropriate versions of Minecraft, you can play both via smartphone and tablet, only the server takes a lot of resources. To solve this problem, the server is better to assign a computer that does not participate in the game.
Logical local network
Step by step let's figure out what to do to play on the network in minecraft through hamachi. For this:
- First of all, you need to download hamachi. Link to the official website.
- Download the same version on all computers, install it.
- On one of the computers, preferably, the volume that will be the Minecraft server, create a connection to hamachi. Enter the network name and password to connect to the network of other participants.
- On other computers, you can now connect to the created network by entering the appropriate name and password.
- Now that the connection is established, you can run Minecraft on the main computer and create a world. After creating open the world to the network. We remember the port that will be specified in the chat when you open the world on the network.
- Having started Minecraft, the participants copy the IP address of the main computer (IPV4 - it's easy to copy it into hamachi), select “direct connection” to the server in Minecraft and insert this IP into the “Server address” field, and after it, without the spaces “:” and port number. After that, click "Connect" and get to the server.
Creating a server for Minecraft
If you want 5-10 people to participate in the game, then it will be more convenient to make a normal server.
In order to make it necessary
- First, download the server part from https://minecraft.net/ru/download/server.
- The downloaded file is placed in a separate folder, which will simultaneously be the root of the server directory. Run the file and give unpack the files necessary for the server to work.
- The server is ready to go. To configure it, you will need to make changes to the server.properties file . It has many parameters, but first of all, the gamemode will help , which allows you to set the default game mode, white-list, which will allow access only to certain players, and max-build-height, primarily to limit the load on the server .
It is worth noting that the files in use are subject to change, and the changes you make take effect only after the server is rebooted. Therefore, it is more correct to edit the server settings when it is turned off.
How to play on the network in Minecraft. Connect to your server in Minecraft
If we still want to connect to our server from the same computer on which it is running, then we need to start the Minecraft client, and when connecting to the server, specify localhost or 127.0.0.1 as the IP. The default port is usually 25565.
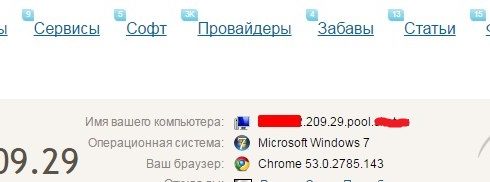
To connect to your server via the Internet, it’s better to have a static IP on it, otherwise you will have to enter almost every time you reconnect new address . To determine the IP address of the server (where to connect?), The easiest way is to use an online service such as http://2ip.ru. "Your computer name", consisting of four series of numbers - this is your IP address. The port for Minecraft is still the same - 25565.
If the server connects to the Internet indirectly through a router, a router, then this port can be closed on the router. In this case, the best solution would be to open or “forward” this port on the router. Opening a port on a router requires accessing it through its web interface, and sometimes downloading additional software.
In the simplest case, you can go to the web interface of the router using the settings specified on its case. The IP address can change, and when entering the web interface itself, the login: admin and password: password combinations almost always work.
Depending on the router model of its firmware version, the “forwarding” function may be called NAT or Port Forwarding. Having found the corresponding menu item, you should fill in the start and end port fields with the desired value (in our case, 25565), and in the IP address field specify the address of the computer that we use as a server. Port configuration is done for TCP and UDP protocols. After this operation, the server should be available to users via the Internet.
In order for the server with high attendance to work stably, it must be administered, but this is a separate topic. Stable servers are usually made not on Windows, but on Linux, and this OS has many features. In addition, to maintain public interest, additional mods and scripts will be required. All this will take time and effort, and more than one article will go into the description of the administration process itself.
Video, how to play on the network in Minecraft on smartphones and tablets:
This guy could, and you too will succeed.
Where to connect?